Simulation Setup
This guide walks you through setting up the Gazebo simulation used in the Your First Project tutorial.
Step 1: Start a Simulation Environment
Visit cans.viam-labs.com, and follow the prompts to log in. Wait for your instance to start.
Note
The simulation session has a 1 hour time limit, but can be extended. Watch the session time in the top toolbar.
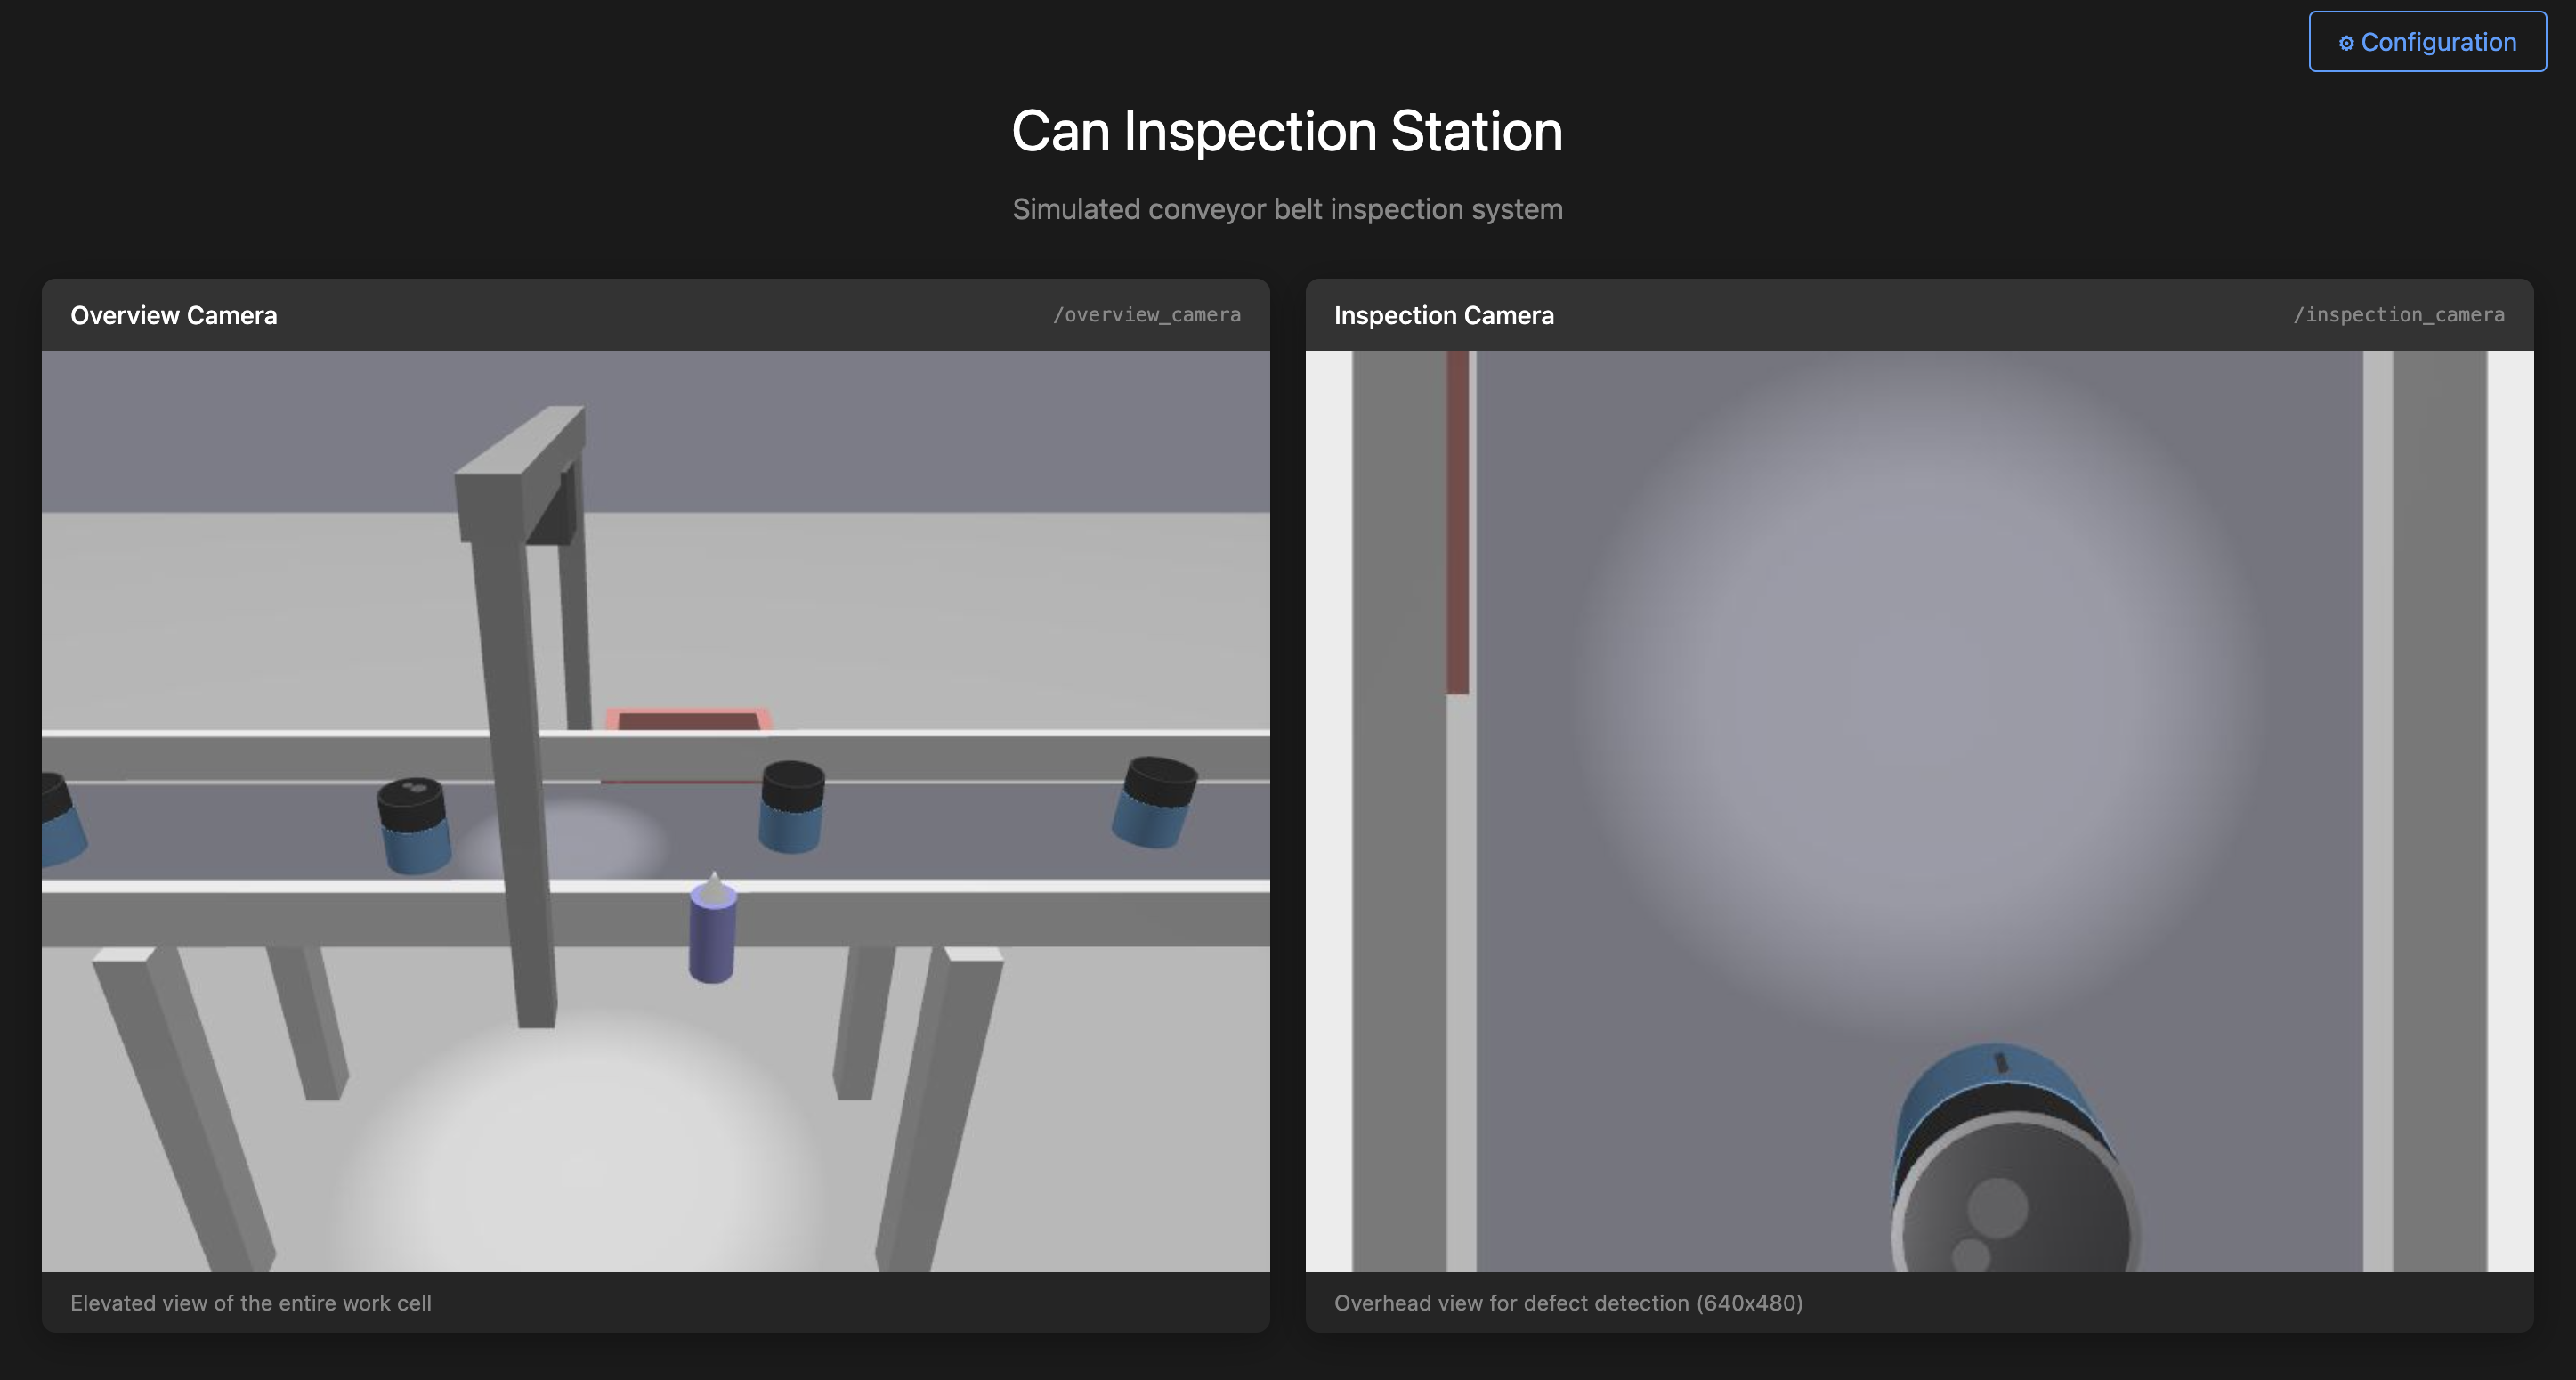
Step 2: Verify the Simulation
When your instance is finished starting, you should see two live camera feeds from the inspection station:

If the camera feeds every go dark or stops responding, try refreshing the page or press Ctrl+R.
Step 3: Create a Machine in Viam
Go to app.viam.com and create a free account or log in
Click the Locations tab
Click + Add machine, name it
inspection-station-1, and click Add machine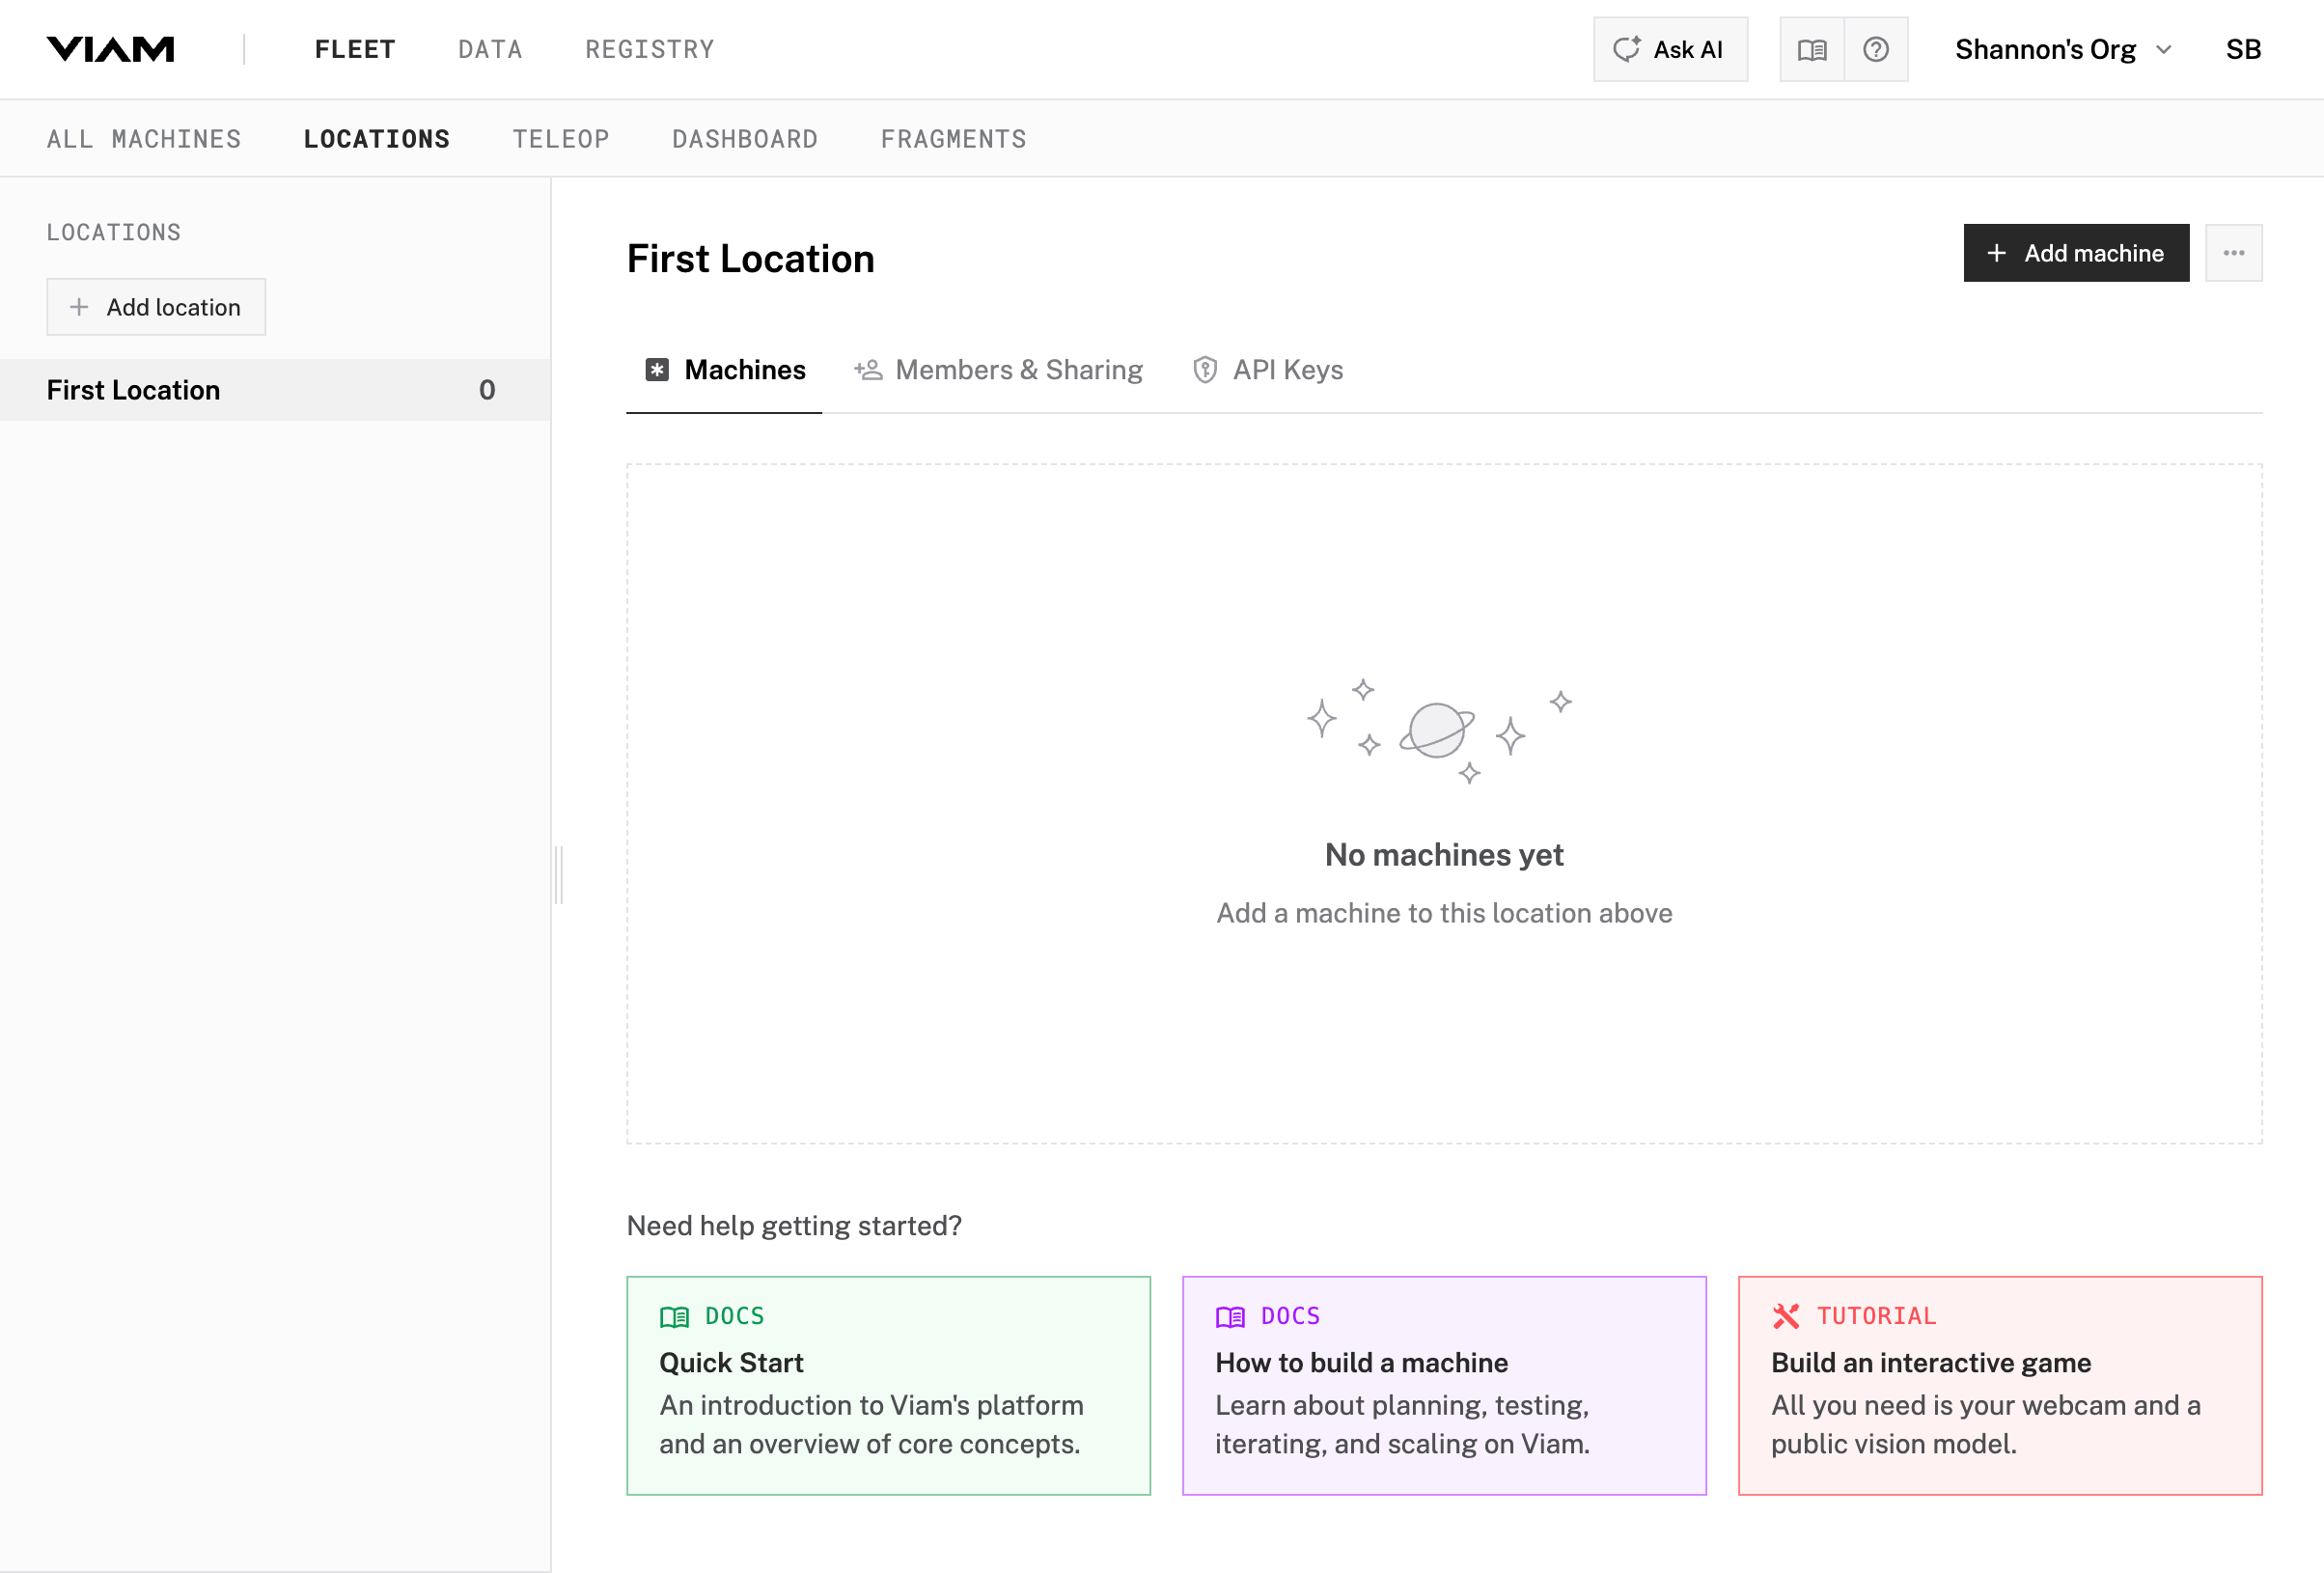

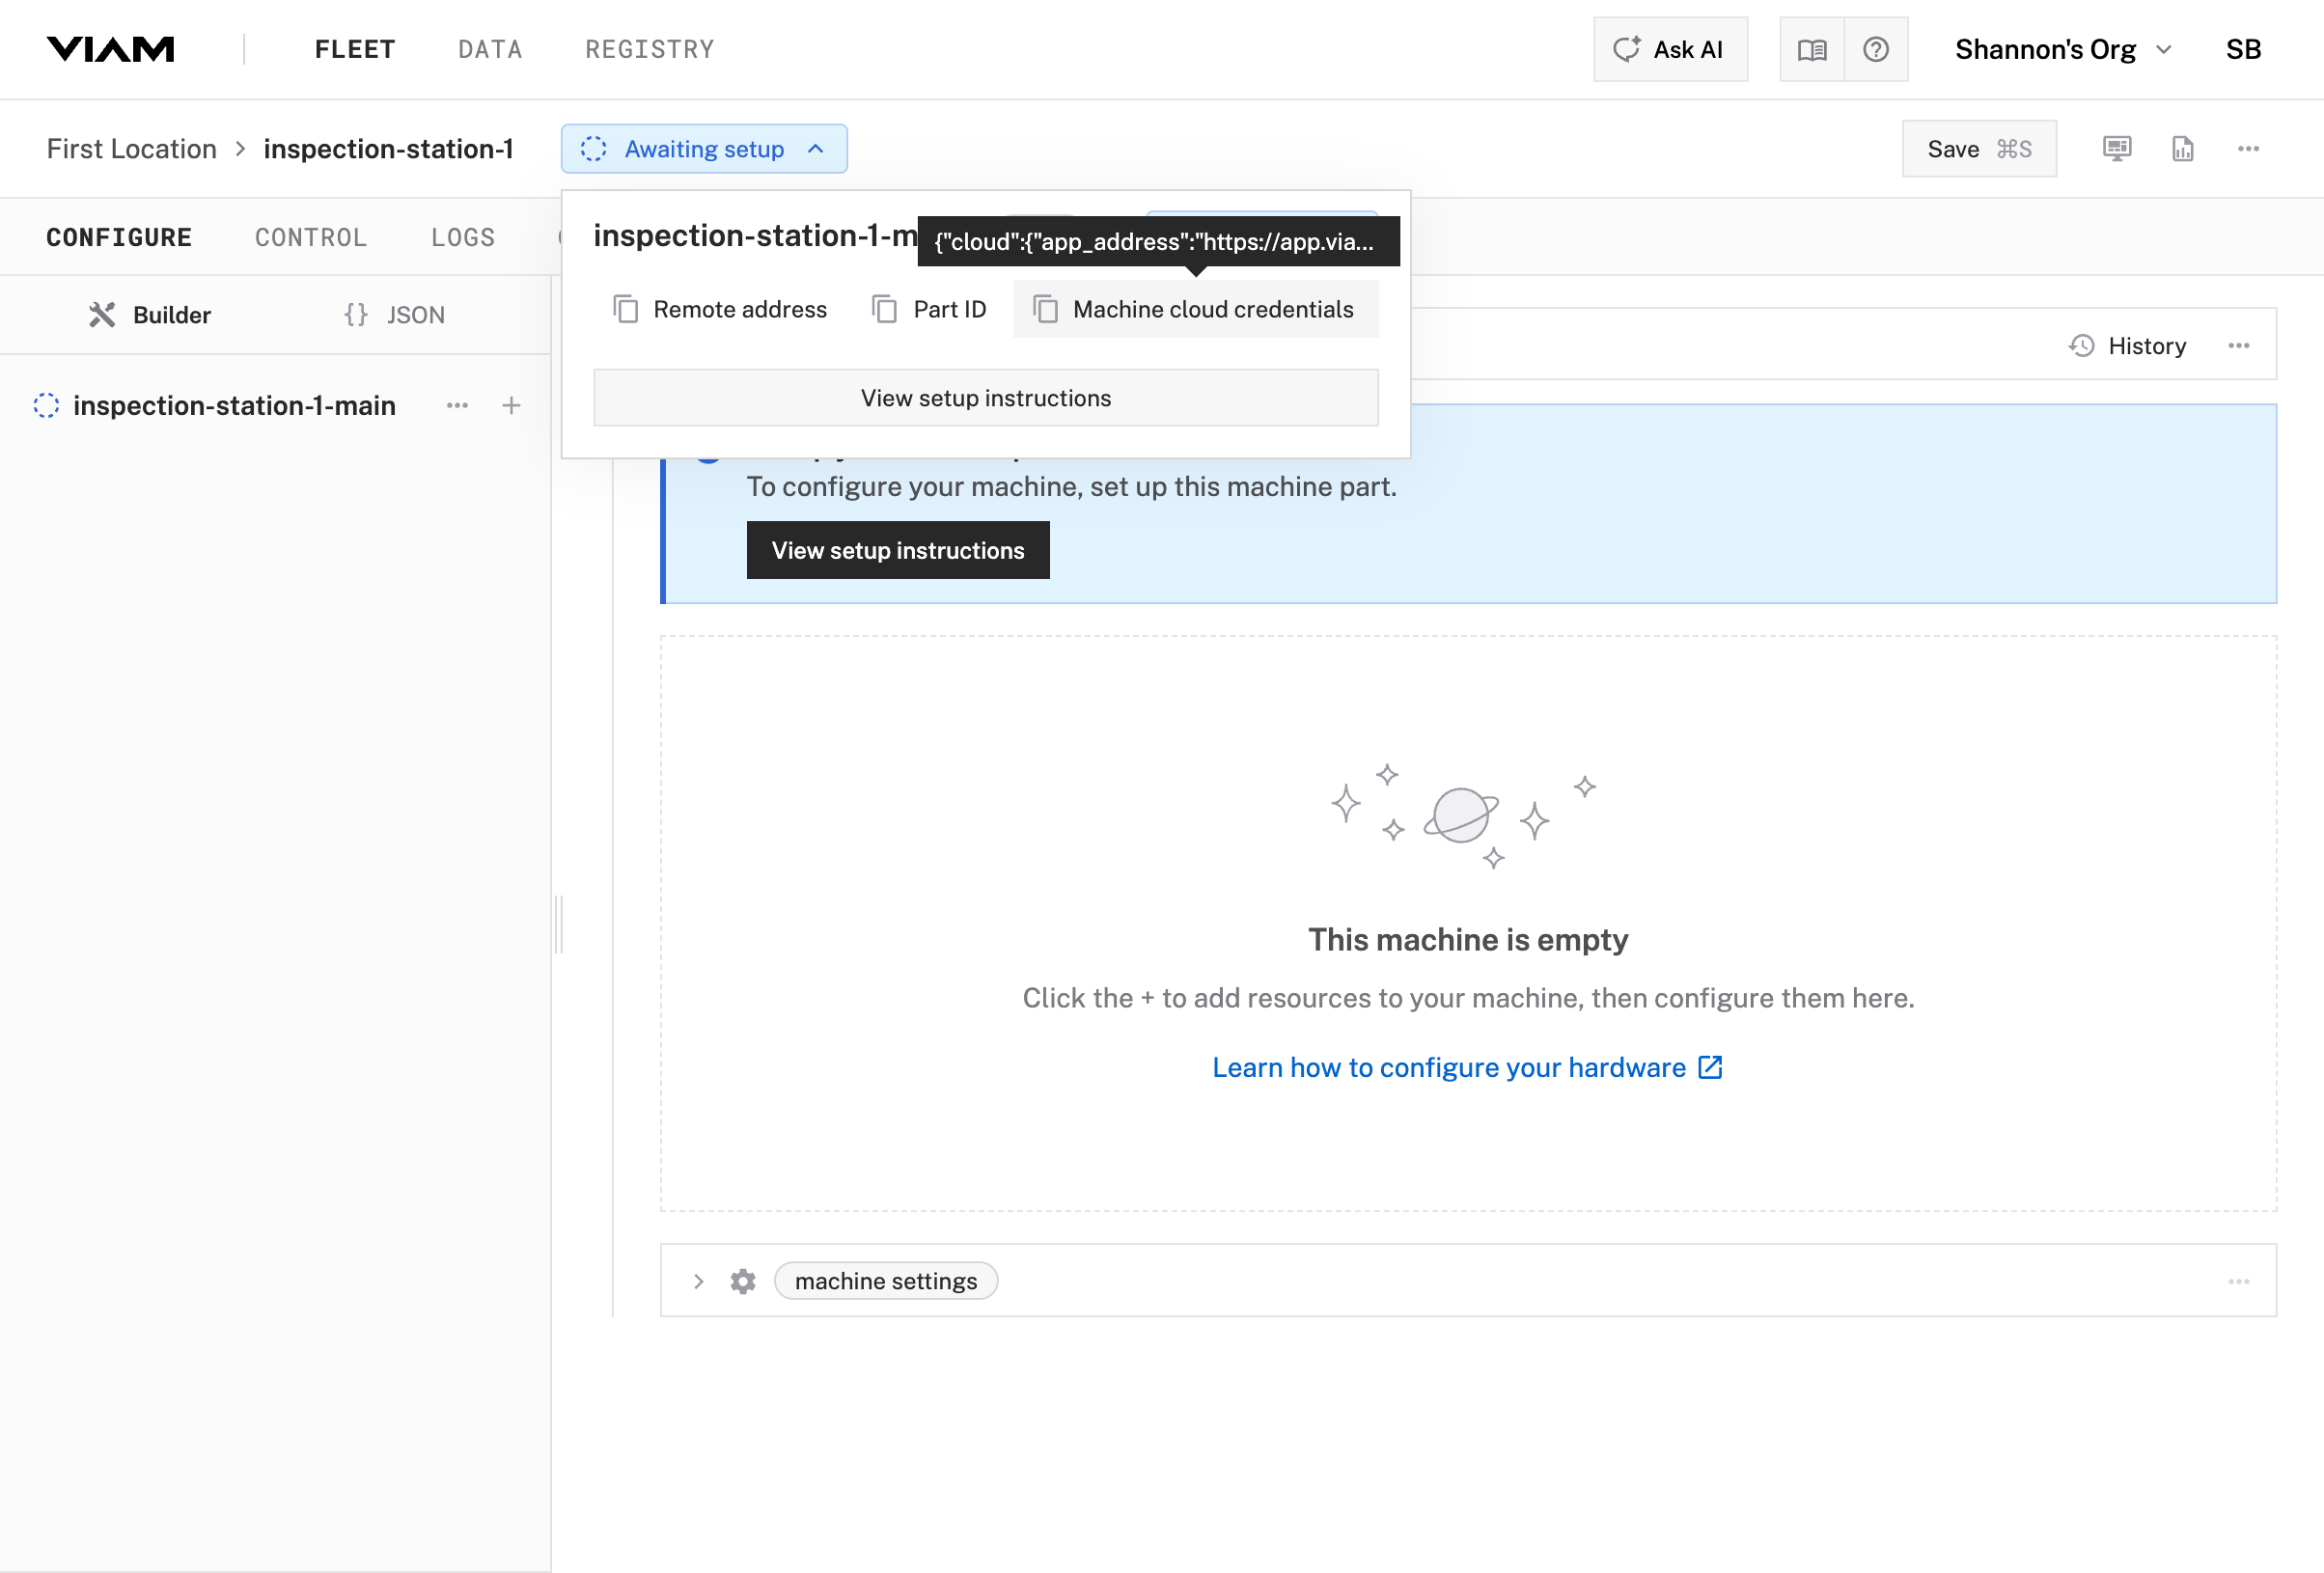
Step 4: Configure Machine Credentials
In the Viam app, click the Awaiting setup button on your new machine and click Machine cloud credentials to copy the credentials JSON
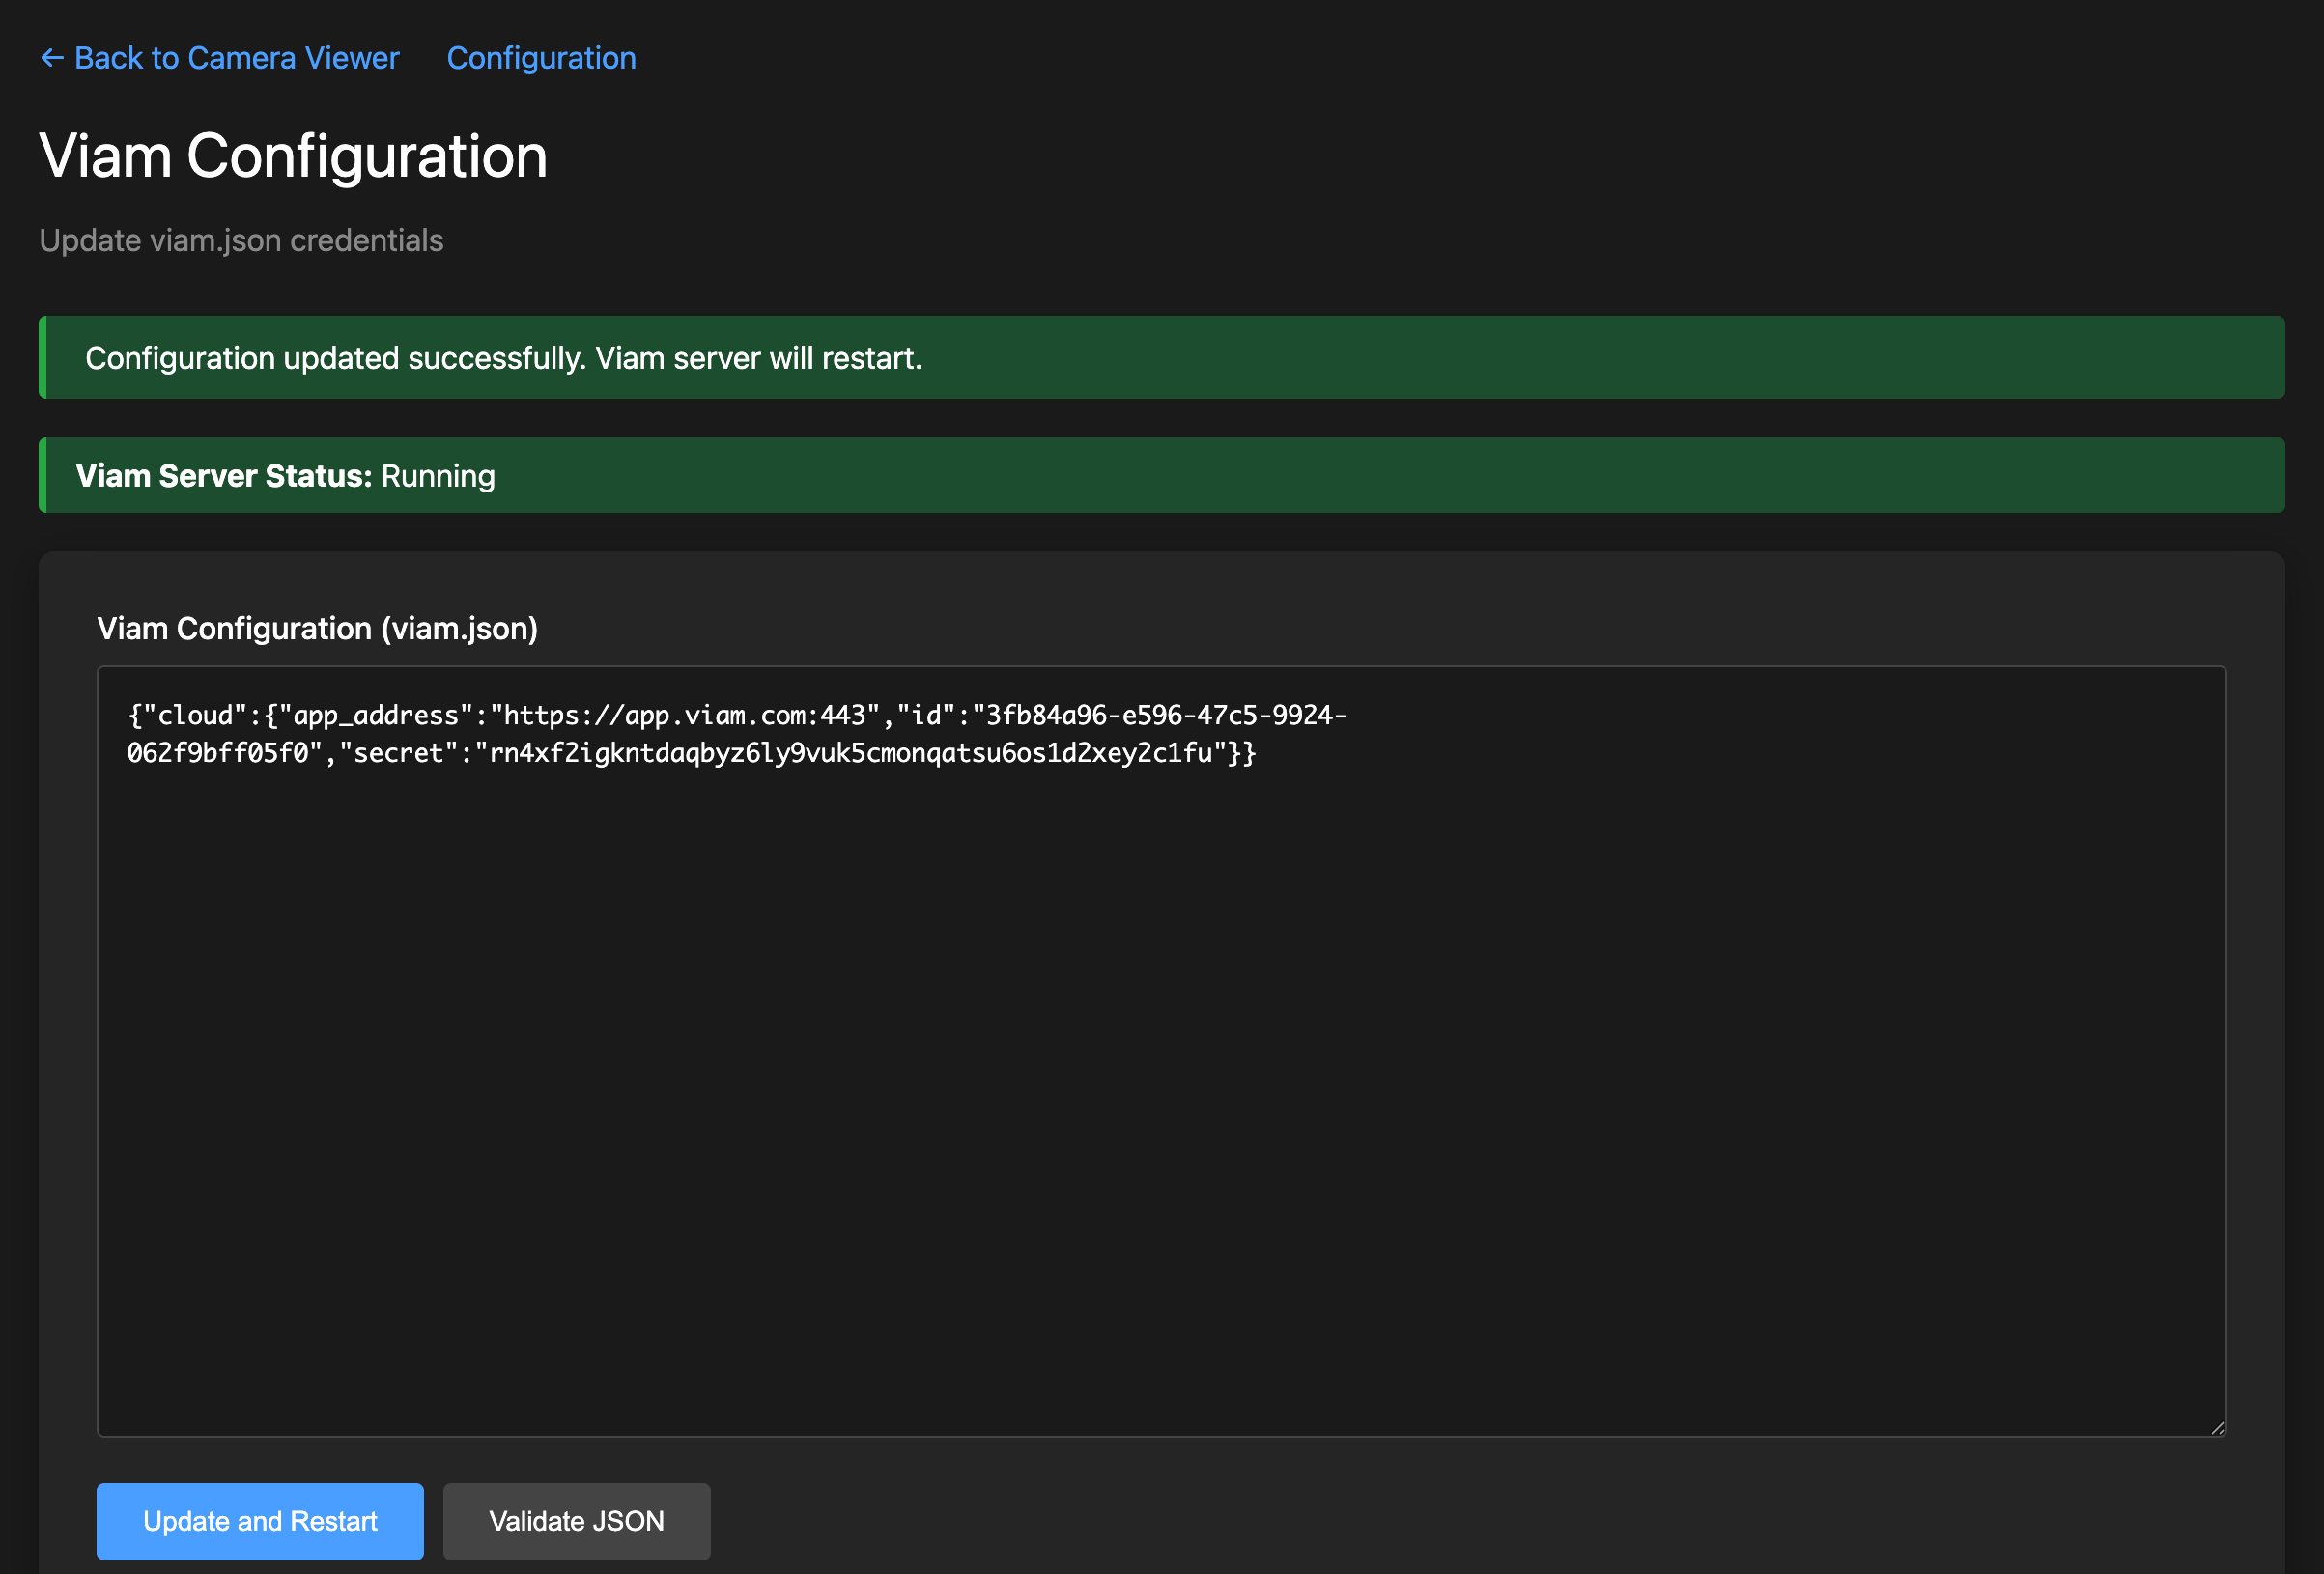
In the simulation viewer, click the Configuration button in the upper right corner
Paste your machine’s credentials into the Viam Configuration (viam.json) text area and click Update and Restart
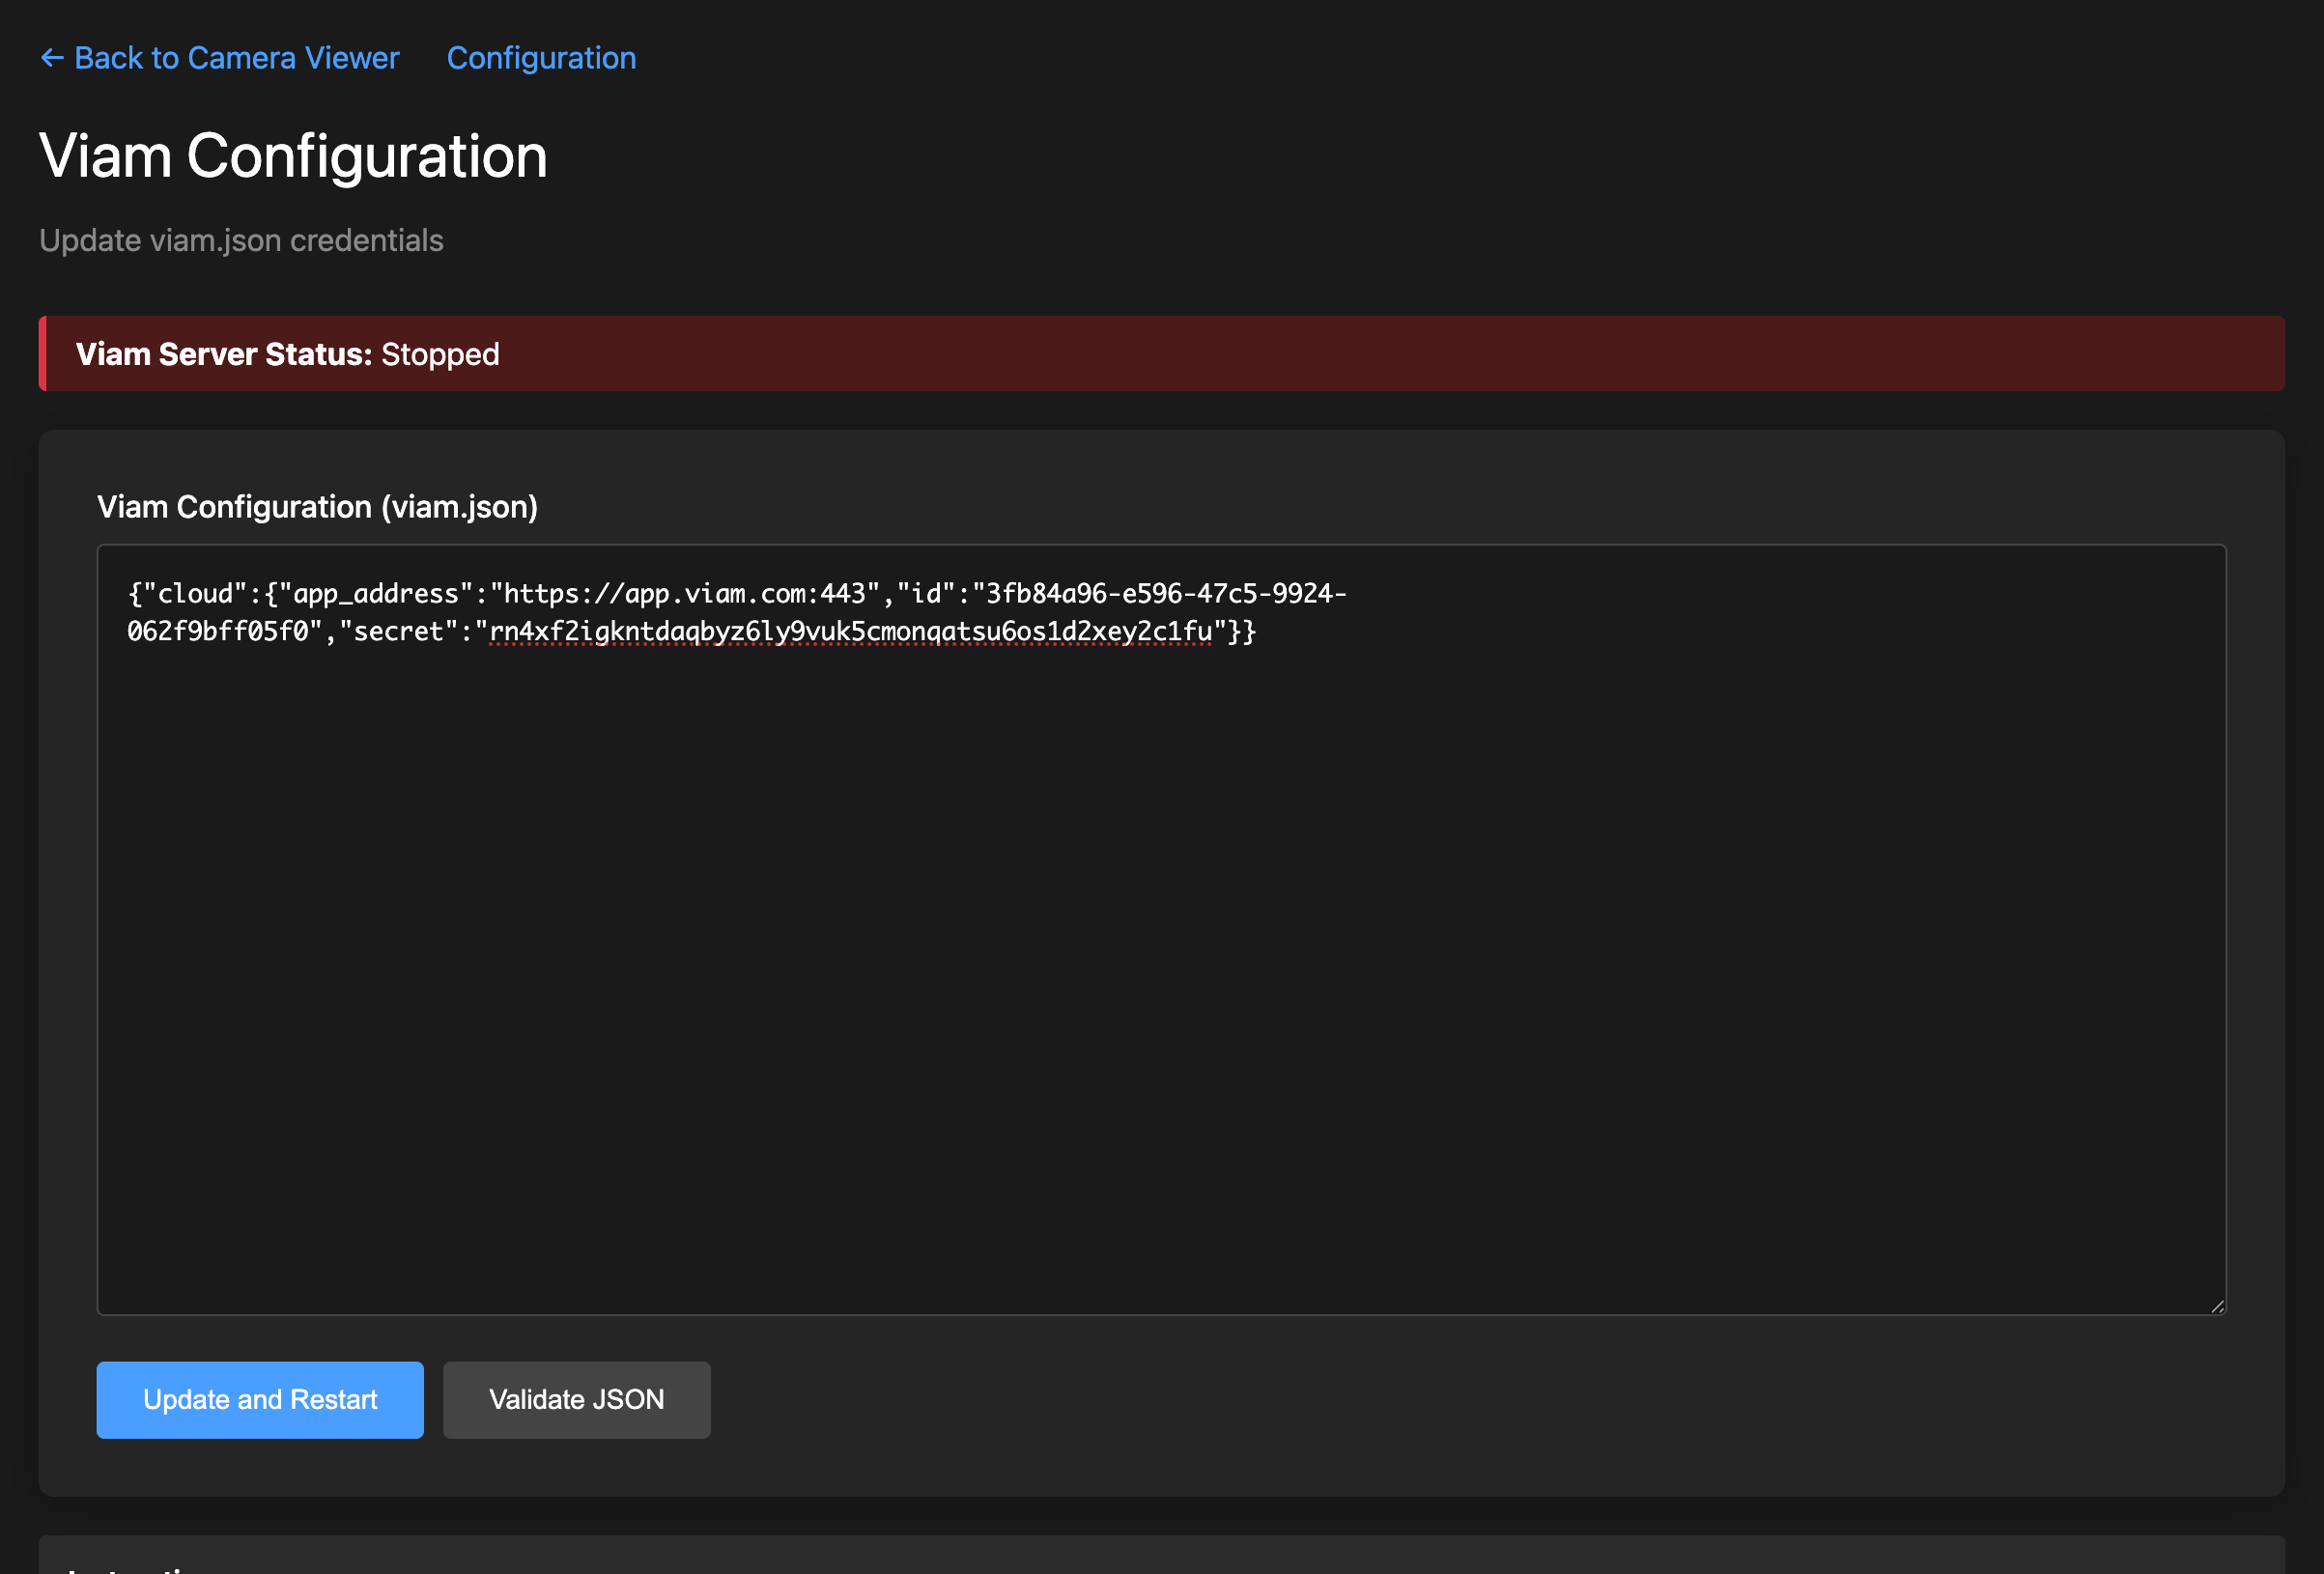
A green banner will confirm the configuration was updated successfully and the status indicator will change to Running.


Step 5: Verify Machine Connection
Go back to your machine’s page in the Viam app. The status indicator should now show Live.

Ready to Continue
Once your machine shows Live in the Viam app, you’re ready to continue with the tutorial.
Continue to Part 1: Vision Pipeline →
Was this page helpful?
Glad to hear it! If you have any other feedback please let us know:
We're sorry about that. To help us improve, please tell us what we can do better:
Thank you!